No products in the cart.


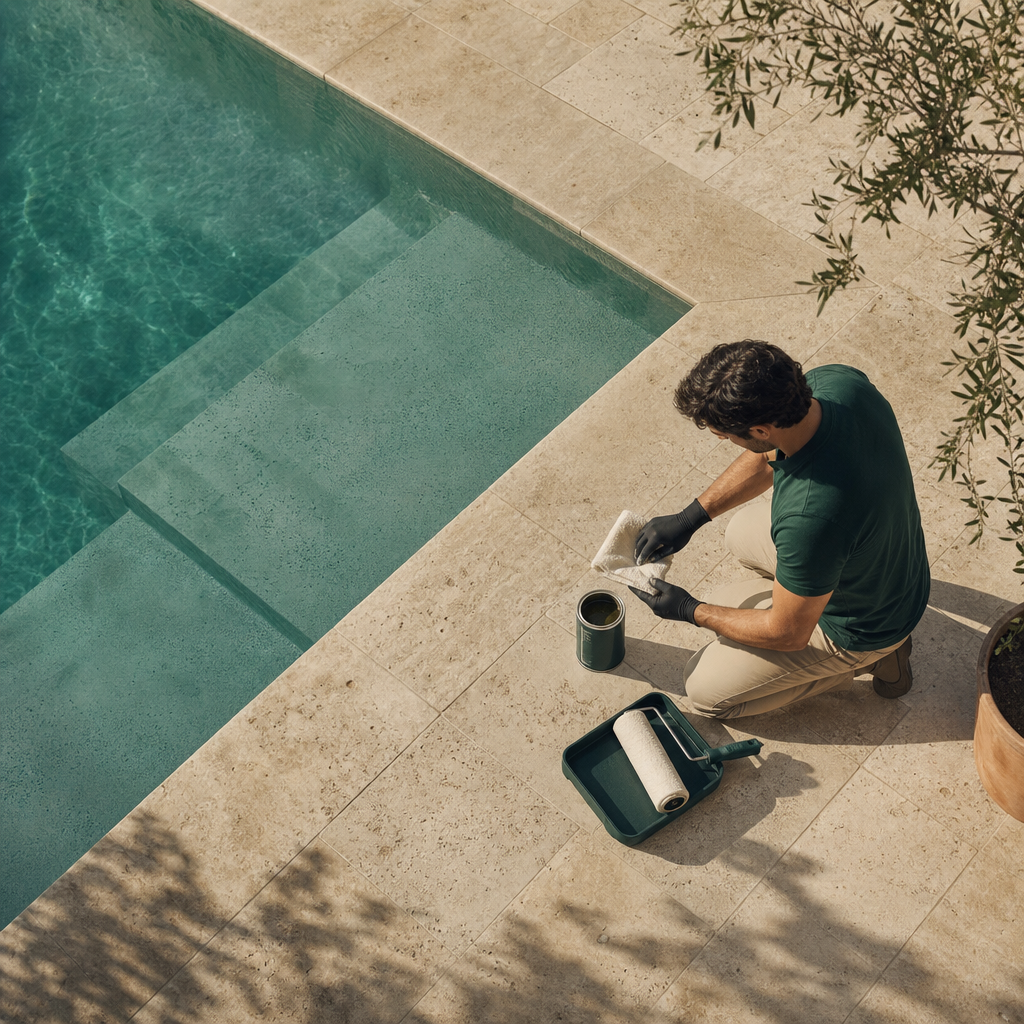
Sealed correctly, travertine keeps its soft, natural veining while shrugging off coffee, oil and shampoo long enough for you to wipe a spill away. For a typical 20–30 m² room, plan around 2–3 days end to end—cleaning, drying and curing—and a materials budget in the tens of dollars rather than hundreds, depending on the sealer you choose. Learning how to seal travertine tiles is less about muscle and more about patience: the stone has to be clean, bone-dry and matched to the right penetrating product before a single coat goes down. At Agata Iraq we specify travertine and complementary surfaces for kitchens, bathrooms, villas and towers, so we see exactly which sealing habits protect a floor and which ones cut its life short.
Table of contents
What sealing actually protects against
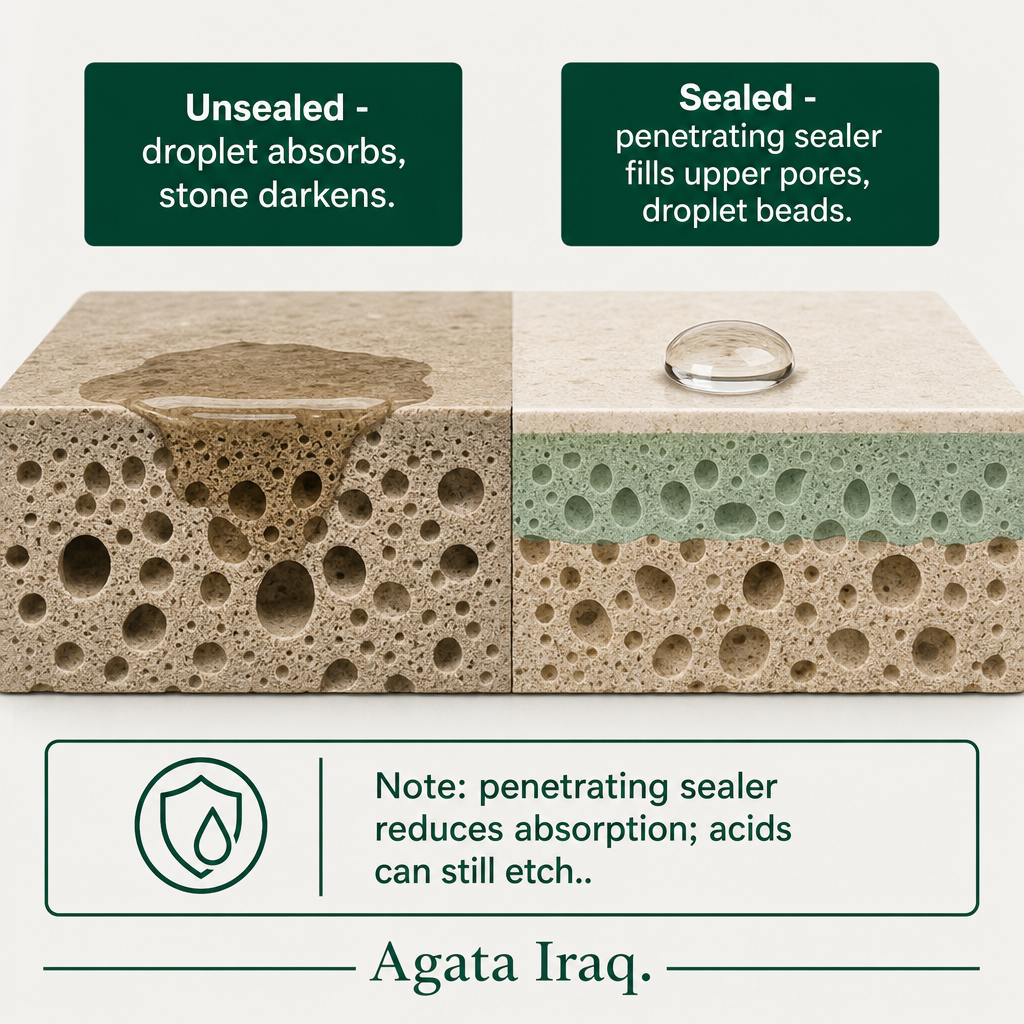
Travertine is a porous limestone. Left unsealed, it readily absorbs liquids and can stain or etch from ordinary spills. A penetrating, or impregnating, sealer soaks into the stone’s pores and lowers absorption, so oil, coffee, shampoo and cleaning products stay near the surface instead of wicking deep into the tile. That is the whole mechanism: you are not building a shell, you are slowing the stone down.
The practical payoffs are specific. Spills sit on top longer, buying you time to wipe them before they mark the stone. Everyday cleaning gets easier because dust and grime no longer lodge in open pores. And the colour and veining stay more consistent over the years, which matters when the travertine is part of a considered interior rather than a utility floor.
One thing sealing does not do is make travertine indestructible. Acids—vinegar, strong descalers, many bathroom cleaners—can still etch a sealed surface, and water left standing for long stretches can still cause trouble. This is also why topical coatings that sit on top of the stone are generally avoided on floors: they peel, scratch and turn slippery in wet areas. A penetrating product that keeps a natural or subtly enhanced look is the safer default for both honed and polished finishes.
Prerequisites checklist before you open the tin
Most sealing failures are decided before any product is applied. Work through this list first.
- Confirm the material and finish. Make sure you are sealing real travertine, not porcelain that imitates it. Porcelain such as our ABSTRA porcelain range is dense and usually needs no surface sealing. Note whether your travertine is honed, polished, tumbled or brushed, because that changes how thirstily it drinks sealer.
- Check the condition of the tiles. Inspect for cracks, loose or hollow-sounding tiles and noticeable lippage. Structural or installation faults belong to a professional and must be resolved before sealing, not after.
- Test for an existing sealer. In a hidden corner, drip a few drops of clean water and wait a few minutes. If the water beads, the tile is still protected. If it darkens and soaks in quickly, sealing is due.
- Choose the right sealer. Use a quality penetrating sealer labelled for travertine or natural stone. Pick a natural-look product for minimal change, or an enhancing one for richer colour. For showers, wet rooms and outdoor terraces, choose a product rated for those conditions and follow its coverage, coat count and curing times.
- Check site conditions. The room needs to stay dust-free and well ventilated during application and curing. Do not seal when the floor is cold, damp or still in daily wet use.
- Gather tools. A pH-neutral stone cleaner, bucket and mop, a soft-bristle brush or white pad, a vacuum with a soft brush attachment, a lambswool applicator or paint pad plus sponges and microfiber cloths, painter’s tape and plastic sheeting, nitrile gloves and eye protection.
If you are still selecting the surface itself, our Travertine Silver tiles show the kind of finish that responds well to a straightforward penetrating seal.
The sealing sequence, step by step
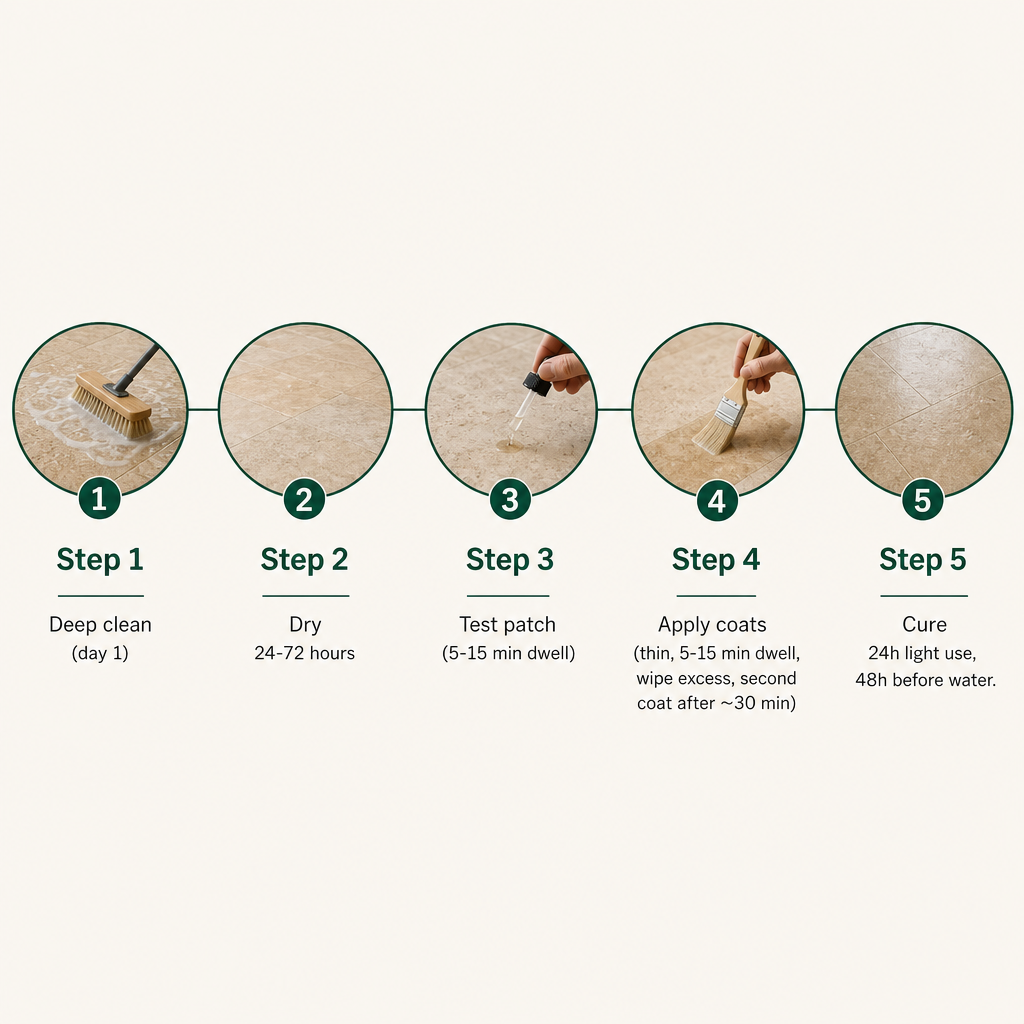
Deep clean the surface. Clear the room, lift rugs and furniture, and vacuum grit out of joints and pores. Clean with a pH-neutral stone cleaner diluted per the label—never vinegar, bleach or acidic bathroom products. Work it into grout lines and corners, then rinse and remove all residue if the product requires it.
Let the stone dry completely. Allow at least 24 hours; many manufacturers specify 24–72 hours depending on humidity and airflow. Use fans or open ventilation, but keep dusty air off the floor. Sealing over trapped moisture is one of the most common causes of cloudy patches and uneven protection, so this step is not one to shorten.
Mask and protect. Tape skirting boards, metal profiles and any adjacent material you do not want sealed, and cover nearby carpet or timber with plastic sheeting.
Test the sealer in a hidden area. Apply a small amount in a discreet corner, let it dwell for the labelled time—often 5–15 minutes—wipe off the excess and let it cure. Check the colour change, sheen and feel before committing to the whole room.
Apply the first coat. Start at the point farthest from the door so you do not seal yourself in. Pour a manageable amount into a tray, then lay a thin, even coat over a small section, roughly 1–2 m² at a time, using a lambswool applicator, pad, sponge or microfiber cloth. Keep a wet edge so you avoid overlap lines, and redistribute any puddles for uniform coverage.
Dwell, then remove the excess. Let the sealer penetrate for the labelled period, commonly 5–15 minutes for interior floors. Then wipe off anything that has not absorbed with clean microfiber or absorbent towels, so no sticky or hazy film is left. Buff the section lightly to an even, low-sheen finish.
Add coats if the finish calls for it. More porous finishes like honed or tumbled travertine often need a second coat; wait the specified interval, often around 30 minutes, then repeat the thin-coat, short-dwell, full-removal routine. Heavy-traffic areas such as lobbies or corridors may need a third coat—follow the manufacturer’s system rather than guessing.
Cure and protect. After the final coat is buffed, keep foot traffic and moisture off the floor for at least the labelled minimum, frequently around 24 hours for light use and 48 hours before water exposure. Avoid dragging furniture or laying rugs during this window. Once cured, repeat the water droplet test: if it beads, the seal is doing its job.
Mistakes that make sealing fail early
Sealing a dirty floor locks dirt and residue into the stone and shortens the sealer’s life. If it has already happened, strip back with a manufacturer-approved cleaner or sealer remover, deep clean and reseal.
Not drying fully leaves cloudy patches, uneven performance and trapped moisture. A mild case may clear with more drying time; a severe one needs a stone-care professional.
Leaving sealer on the surface creates a sticky or hazy film and patchy gloss. Re-activate the residue with a little of the same sealer or its recommended cleaner, buff off thoroughly, and reseal if needed.
Using the wrong product—a topical coating or a non-stone sealer—leads to peeling, slipperiness or weak protection. Switch to a penetrating stone sealer suited to travertine; in commercial or high-traffic sites, bring in a professional to reset the system.
Assuming the seal stops etching invites damage from acidic cleaners and descalers. Stick to pH-neutral cleaners for the long term, and treat serious etching as a honing or polishing job, not a sealing one.
DIY or professional: where to draw the line
Sealing travertine is a realistic DIY project in many homes—small to medium kitchens, bathrooms and living rooms with flat, sound installations, on new or lightly used floors with no deep staining, in spaces you can keep off-limits for two or three days.
Bring in a stone-care specialist or an Agata-recommended installer when the stakes or the problems rise. A tower lobby, villa entrance or hotel spa where appearance must be flawless is one clear case. So are existing faults: lippage, cracked or hollow tiles, or a failed previous coating. Heavy staining, water marks or etching usually need mechanical honing before any sealer goes down, and complex wet rooms, steam showers and large outdoor terraces demand tighter control over product choice and application conditions.
A hybrid path often works best. We help specify suitable travertine, such as Travertine Silver and complementary collections, and an installer carries out the first professional seal, while you handle ongoing maintenance and future resealing with the same product family. If you would like a surface and sealing plan matched to your room, climate and traffic, tell us the space and finish and we will prepare a recommendation.
Frequently asked questions
How often should I reseal travertine in a busy household?
For interior kitchen and living-area floors, a typical interval is every one to three years, depending on foot traffic, cleaning habits and the product used. In dusty conditions or homes that entertain often, run the water droplet test yearly; when water stops beading, plan a fresh coat.
Do bathrooms and showers need a different sealer?
Wet rooms face constant moisture and soap, so use a penetrating sealer specifically rated for wet areas and be strict about drying and curing times. Good ventilation and regular pH-neutral cleaning keep the seal performing.
Can I use my ceramic or porcelain tile cleaner on travertine?
Many general tile cleaners are acidic or strongly alkaline and can damage travertine even when it is sealed. Use only pH-neutral cleaners formulated for natural stone, as sealer manufacturers recommend.
Do porcelain tiles that look like travertine need sealing?
Porcelain, including our porcelain collections, is generally very dense and needs no sealing on the tile face, though cement-based grout joints may benefit from a suitable sealer. Always check the specific product’s technical sheet.
Will sealing remove stains or etching that are already there?
No. Sealing locks in whatever is present rather than removing it. Deep stains or etched areas should be cleaned or honed first—often professionally—then sealed to protect the restored surface.