No products in the cart.


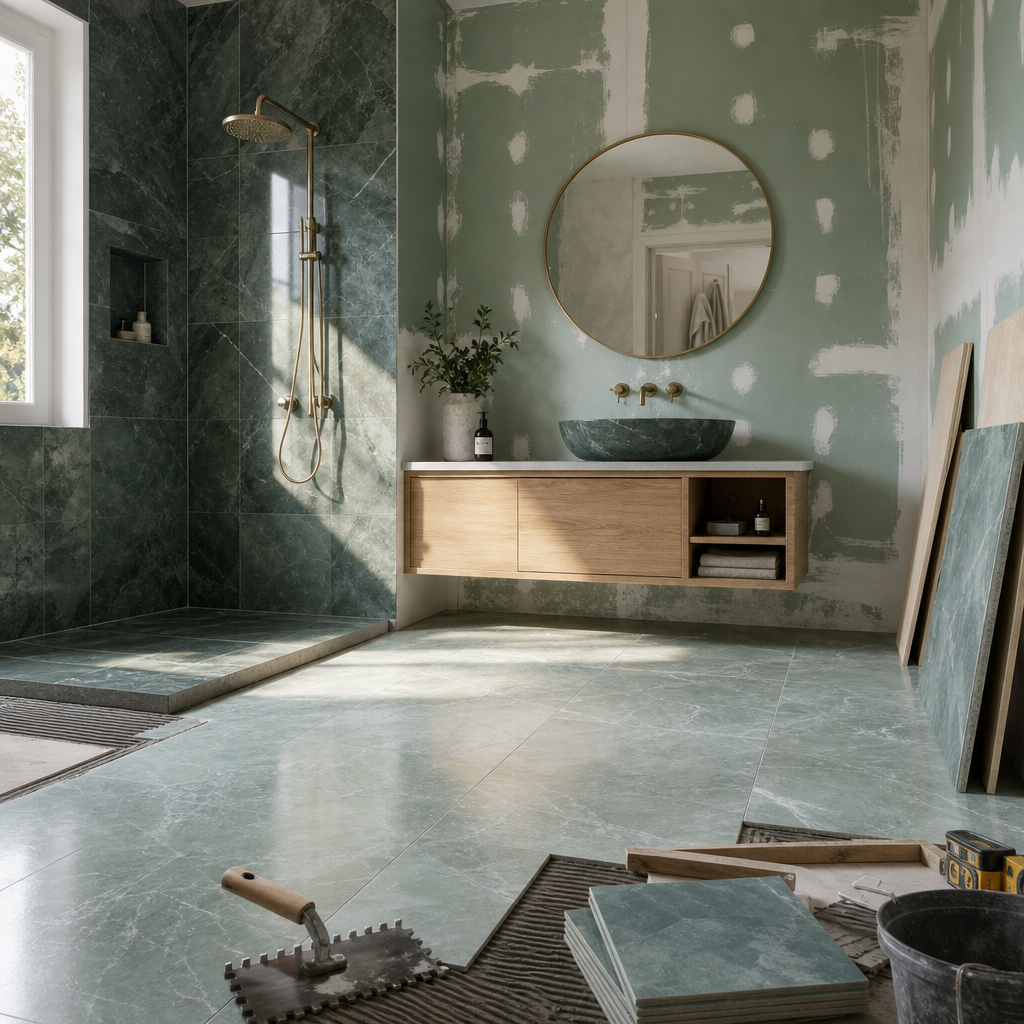
A well-planned bathroom renovation can turn a tired, leak-prone room into a modern, water-tight, easy-to-clean space in roughly 2–4 weeks, with mid-range projects often landing in the equivalent of US$5,000–15,000 depending on size and finishes. Knowing how to renovate a bathroom step by step is mostly about sequencing: each stage has to be finished properly before the next one starts, because problems buried under tile or waterproofing are expensive to fix later. In Iraq, the final figure swings on tile and slab choices, fixture brands, and whether you move plumbing or electrical points, so the planning you do before demolition matters more than any single product decision.
This guide walks through the full order of work the way professional renovators approach it, from the prerequisites checklist to final handover. We keep the physical connection of water, drainage, and electrical systems out of the how-to detail on purpose: those are regulated tasks for licensed trades, and treating them casually is where renovations go badly wrong.
Table of contents
Before you start: prerequisites checklist
Most renovation regret traces back to decisions skipped at this stage. Settle each of these before anyone lifts a hammer.
- Define the scope. Decide whether this is a cosmetic refresh (new tiles, vanity, fittings over sound surfaces) or a full gut renovation down to substrate and subfloor. The two paths have very different budgets and timelines.
- Decide if the layout moves. Keeping the toilet, shower, and basin in place is far cheaper. Every relocation adds plumbing, drainage, and cost.
- Measure and document. Record length, width, ceiling height, window and door positions, and note the existing drain, supply, electrical, and ventilation points.
- Budget by trade, not by lump sum. Split the money across demolition, plumbing and electrical, waterproofing, tiles and slabs, fixtures, and accessories, then add 10–15% contingency for hidden problems like leaks or rotten subfloor.
- Plan the calendar. Allow 2–4 weeks for a standard bathroom, and add time if you are moving plumbing or custom-ordering materials.
- Lock the design direction. Choose a style and palette that agrees with the rest of your home. For a cohesive, low-maintenance finish, our Travertine-look Travertine Silver tiles and graphic Abstra porcelain tiles let you carry one material story across floors, walls, and the shower.
- Specify materials and fixtures early. Confirm wall and floor finishes, sanitary ware, storage, and lighting before demolition, and order long-lead items (custom glass, special tiles, imported fixtures) in advance.
- Clear the regulatory ground. Check with your municipality or building management whether plumbing relocation, new circuits, or structural changes need permits, and plan to use licensed plumbers and electricians for that work.
- Sort the practical logistics. Arrange an alternative bathroom during the works, plan dust protection and delivery routes, and confirm permitted working hours, which matter especially in towers.
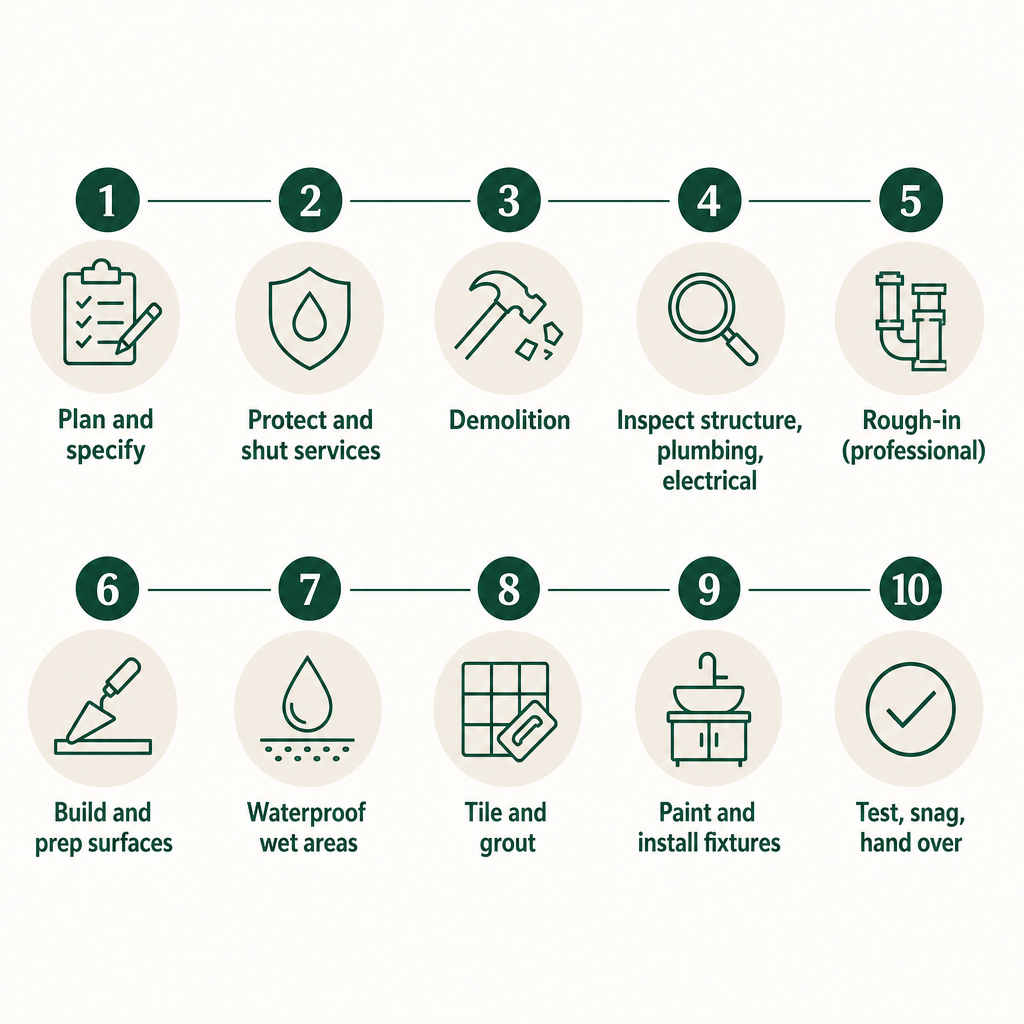
The step-by-step renovation sequence
This order follows the way professional renovators work, so each stage supports the next. It shows how to renovate a bathroom step by step without walking you through regulated plumbing and electrical connections.
Step 1: Finalize layout, design, and specification
Draw a simple scaled plan showing fixture positions, tile layout, and lighting points, and agree floor levels and drain slopes with your contractor. Select every finish now — tiles, slabs, grout colors, profiles, sanitary ware, and fittings — and confirm availability before demolition. For a minimalist, easy-to-clean room, large-format porcelain slabs on walls reduce grout lines, paired with slip-resistant porcelain on the floor.
Step 2: Protect the home and shut services
Install dust barriers at the door and cover nearby floors. Shut off the water supply to the bathroom and, where needed, power to the circuits serving the room before demolition begins. Remove or cover anything you intend to keep so it survives the strip-out undamaged.
Step 3: Demolition and strip-out
Work from soft to structural: mirrors and accessories first, then sanitary fixtures, then tiles and old flooring. On a full renovation, strip damaged surfaces back to sound substrate — brick, block, concrete, or framing — and expose the subfloor where necessary. Clear debris promptly and dispose of heavy tile and mortar waste according to building rules, which may require special bins.
Step 4: Inspect structure, plumbing, and electrical
With surfaces open, this is your one clear look inside the room. Check for water damage, mould, cracked screed, and sagging floors. Have your plumber inspect pipes, joints, and traps for corrosion or leaks and confirm drainage falls are adequate, and have your electrician evaluate wiring, junction boxes, and circuit capacity for new lighting, fans, or heated floors. Fix structural and moisture problems now — tiling over damp or unstable substrate is a leading cause of failure.
Step 5: Rough-in plumbing and electrical (professional scope)
A licensed plumber installs or relocates supply lines, drains, and fixture connections for the new layout; a licensed electrician runs or moves wiring for lighting, mirror lights, exhaust fans, and outlets with appropriate protection near wet areas. This is when correct heights for wall-hung toilets and mixers are set, and where niche and shelf services are positioned safely. Many jurisdictions require inspection or contractor sign-off before walls are closed.
This guide does not cover how to physically connect water, drainage, or electrical systems. Treat those as regulated tasks for qualified professionals.
Step 6: Build and prepare walls and floors
Repair or replace subfloor and screed so it is solid, level, and sloped toward drains in wet areas. Use moisture-resistant board or render on dry walls, and cement backer board or another approved substrate in showers and behind bathtubs. Fix backer boards with corrosion-resistant screws at the right spacing, keeping fasteners flush and joints treated. Insulate exterior walls where needed and seal openings that let in dust or insects.
Step 7: Waterproof all wet areas
Waterproofing is the single most critical step for a long-lasting bathroom, and the stakes are highest in multi-storey buildings where a leak reaches the units below. Apply a compatible membrane — liquid-applied or sheet — to shower floors and walls, around tubs, and any other wet zone, following the manufacturer’s instructions. Confirm the shower floor slopes consistently to the drain, and seal every corner, joint, and floor-to-wall transition, often with reinforcing tape embedded in the membrane. Treat screw holes, seams, and pipe penetrations carefully to avoid pinholes, then let the membrane cure for the full specified time before tiling. For walk-in showers, many installers run a flood test to confirm there are no leaks before proceeding.
Step 8: Tile and grout
Plan the layout from the centerline of walls or floors so cut tiles balance at edges and around fixtures, and dry-lay a few rows to check joints align with niches, mirrors, and sills. Set tiles in appropriate thin-set mortar with full coverage and no voids, especially in wet areas, use spacers for consistent joints, and check regularly with a level. Once the mortar cures, grout, clean off the excess thoroughly, and seal grout if your type benefits from it. A modern Iraqi bathroom often reads best with large-format porcelain slabs on the main walls and a textured porcelain floor.
Step 9: Paint, install fixtures, and complete trim
Paint non-tiled surfaces with moisture-resistant bathroom paint after priming and drying. Install larger fixtures first — vanity, basin, toilet, shower fittings — then work down to accessories. Fit glass screens or enclosures with correct alignment and sealing at floor and wall junctions, and mount mirrors, bars, and shelves with fixings suited to tiled surfaces so nothing cracks. Finish by running flexible sanitary caulk along wall-to-floor junctions and around basins, tubs, and penetrations.
Step 10: Test, clean, and hand over
Flush the toilet repeatedly, run the basin and shower, and check every visible joint for leaks. Run the exhaust fan to confirm airflow, and inspect tiles for hollow sounds, cracks, or unevenness. Build a snag list of small items — loose handles, silicone gaps, paint touch-ups — for the contractor to close before final payment, and keep warranties, product documents, and any inspection records together for the future.
Common mistakes and how to avoid them
The failures below repeat across renovations and almost all are preventable earlier in the sequence.
| Mistake | Why it happens | How to prevent it |
|---|---|---|
| Inadequate waterproofing | Skipping membranes or sealing only the shower floor | Waterproof full shower floors and walls, tub surrounds, and wet niches with a tested system, strictly per instructions |
| Poor substrate prep | Tiling over cracked, uneven, or damp surfaces | Repair screeds, set correct slope, and dry substrates fully before tiling |
| Moving plumbing without a plan | Shifting drains without checking fall and venting | Engage a plumber early and design the layout around feasible drainage |
| Underestimating electrical needs | Adding lights and sockets without circuit planning | Let an electrician design circuits and safe positions near wet areas |
| Ordering too few tiles | Calculating area with no waste allowance | Add 10–15% for cuts and breakage, and keep spares for future repairs |
| Ignoring ventilation | Focusing on finishes over humidity control | Install or upgrade an exhaust fan and design airflow around openings |
On tile quantities specifically, we can help size an order correctly for your layout so you neither run short mid-installation nor lose the ability to match a damaged tile later.
DIY versus professional: where to draw the line
Many homeowners in Iraq can own the parts of a renovation that carry no leak, shock, or structural risk. Realistically, you can handle the design concept and material selection, choosing tiles, slabs, grout colors, and fixtures, removing accessories and doing basic cosmetic strip-out in coordination with your contractor, and painting non-tiled walls or fitting simple accessories after tiling.
Leave the following to licensed or experienced professionals: layout changes that move toilets, showers, or major drains; any plumbing beyond swapping surface-mounted fittings; electrical work involving new circuits, moved points, or anything near water; structural changes to walls, slabs, or heavy elements like large stone tops; and complex waterproofing, walk-in showers, and large-format slab installation where a mistake causes major damage. A simple rule holds throughout: you can plan, specify, and do light-duty finishing, but anything that can cause leaks, electric shock, or structural problems belongs to a qualified professional.
Renovating a bathroom in Iraq: local factors
Several conditions specific to Iraqi homes should shape your decisions. High-rise apartments in Baghdad, Basra, or Erbil often carry strict rules on noise, working hours, and wet-area changes, so confirm them with building management before starting; villas allow more freedom but still demand attention to water pressure, drainage, and backup power. Variable water pressure and hardness reward mixers and toilets suited to local conditions, and durable, easy-clean porcelain surfaces handle frequent cleaning and mineral deposits well. Hot summers and humid spells make efficient ventilation and uncluttered, easy-to-wipe surfaces genuinely practical rather than merely stylish.
Supply timing is the other local reality: imported fixtures and tiles can carry long lead times, so our curated brands and in-stock collections help keep a schedule intact, and for towers or villa compounds we can coordinate bulk orders and a consistent palette across phases. If you want to see how a single space fits into a larger project, our full home renovation planning guide for Iraq sets out scheduling and budgeting across the whole property, our overview of minimalist interior design principles explains how to keep the room visually calm, and our modern bathroom design ideas for Iraqi homes offer concrete layouts and finish combinations to borrow.
Frequently asked questions
How long does a typical bathroom renovation take?
A standard full bathroom renovation usually runs about 2–4 weeks from demolition to final handover, depending on scope, material availability, and inspection requirements.
What is the rough cost to renovate a bathroom?
In many markets a mid-range full renovation commonly falls in the equivalent of US$5,000–15,000, rising if you move plumbing, use premium slabs, or choose high-end fixtures. Local labor and material prices vary, so confirm the range with your contractor and suppliers before committing.
Do I need permits to renovate my bathroom?
You may need approvals for changes affecting plumbing stacks, structural elements, or electrical circuits, especially in apartment towers or managed compounds. Check with your municipality or building management, and use licensed professionals for regulated work.
How long should I wait before using a newly tiled shower?
Most systems require at least 24–72 hours after grouting and caulking before regular shower use, and longer where the waterproofing manufacturer specifies extended cure times. Always follow the exact instructions supplied with your membrane, adhesive, and grout.
What are the best finishes for a modern, low-maintenance bathroom in Iraq?
Large-format porcelain slabs on the main walls with matte or lightly textured porcelain floor tiles give a contemporary look with minimal grout and easy cleaning. Our Travertine-inspired surfaces and graphic porcelain tiles are curated for modern, minimalist, and Scandinavian-influenced interiors.